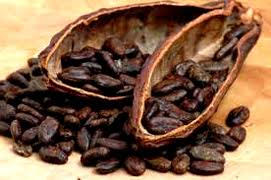
Cocoa butter is the butter from the cocoa beans and is in fact in the form of solid oil. It has high-fat content and is stable as the solid at average room temperature. As it comes from the cocoa beans, it is golden tan in color and has an odor that is chocolaty. Cocoa butter has three to four different glycerides in its composition and hence a large amount of fat.
“Tempering” is the process by which the composition of the fats in cocoa butter is changed to a stable solid that can give the chocolate a shiny or glossy look and provides a hard when it is eaten or broken into parts. This process of tempering is also called pre-crystallizing.
Cocoa butter is pre-crystallized in the chocolates so that it gives a sheen and is hard to break. These types of chocolates have a higher melting temperature and hence can be kept at room temperature. The chocolate doesn’t melt in hand and can be maintained for a more extended period.
Cocoa butter exists in six forms. These forms of the butter depend on the temperature of cooling the chocolate down.
Form 1 : 63F/17C
Form 2: 74F/23C
Form 3: 78F/25.5C
Form 4: 81F/27C
Form 5: 93F/34C
Form 6: 98F/36C
How to Temper Cocoa Butter?
All these forms except the fifth form of the cocoa butter are unstable. The basic concept behind tempering/pre crystallizing is to form the solid crystals of the cocoa butter that can help in interlocking the crystals of the cocoa butter to give a snap sound when it is eaten. The temperatures are critical when you are working with chocolates.
For getting the perfect glossy finish and hard snap, start melting the chocolate at the highest temperature, for example, 45C and start cooling it down slowly. Remember that if you start at a low heat for melting the chocolate, then the chocolate will be in the temperature range of 17C-27C while cooling down, which gives poor crystal and doesn’t help in forming the proper crystals of the cocoa butter.
If you start it at a higher temperature, it will spend its maximum time for cooling in the range of 27C-35C, which is the intermediate range for Form 4 and form 5.
This cooling temperature gives the perfect crystals of cocoa butter and the chain reaction starts which helps in connecting all the crystals that are formed in its composition. These crystals interlock and give smooth chocolate. Such chocolate has a glossy finish and an amazing texture. Cooling down the crystals in the temperature range below it gives dull and soft chocolate which will easily melt in your hands while eating.
Once the crystal formation begins at the right temperature it forms crystals in the chocolate even if you leave it at room temperature.
Many people find the whole process tiresome and messy to follow. But trust me it is one magical procedure to turn your home-made chocolates look like the ones available in the market.
I am listing all the steps of the procedure along with the specifications of temperatures and tools to make your job easy.
Using the seeding technique
This technique will help you in achieving the best result. As this is the tried and tested method by many professionals, I would like to share this technique as it is comfortable and convenient to temper the chocolate by using this procedure.
- Take the chocolate and divide it into 80:20 ratio.
- Cut the 75-80% of chocolate into smaller pieces.
- Add these pieces to the bowl and microwave it till the temperature when it starts melting. Remember that you shouldn’t melt it entirely or you can end up burning the chocolate.
- Once you take the bowl out, stir it to completely melt the chocolate which shouldn’t take more than 15-20 minutes.
- Add the remaining chocolate pieces by grating it in the melted chocolate bowl and stir it till it completely dissolves.
- You can now add this mixture in the molds to give shape to your chocolate and let it cool down.
You can also add 1% ( that is 10g for 1kg chocolate) of cocoa butter that is available in the market for tempering the chocolate. As it is in the beta form of crystal, it will also help in tempering the chocolate correctly. Tempered chocolates have a higher melting point as compared to the untempered chocolates.
Tips:
- Make sure that there is no water in your chocolate because the tempering process cannot be completed in the presence of water. Don't cover your vessels with chocolate with lids having water droplets.
- Also, don't overheat the chocolate beyond 130 degrees as it will give an unpleasant taste due to burning.
0 Comments
Would you like to share your thoughts?
Your email address will not be published. Required fields are marked *